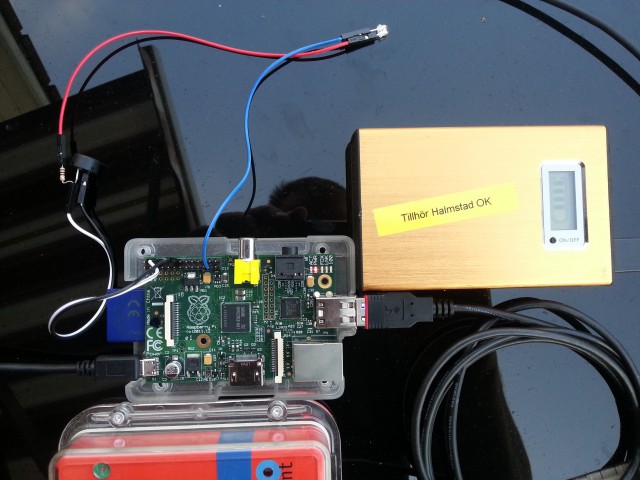
Hardware
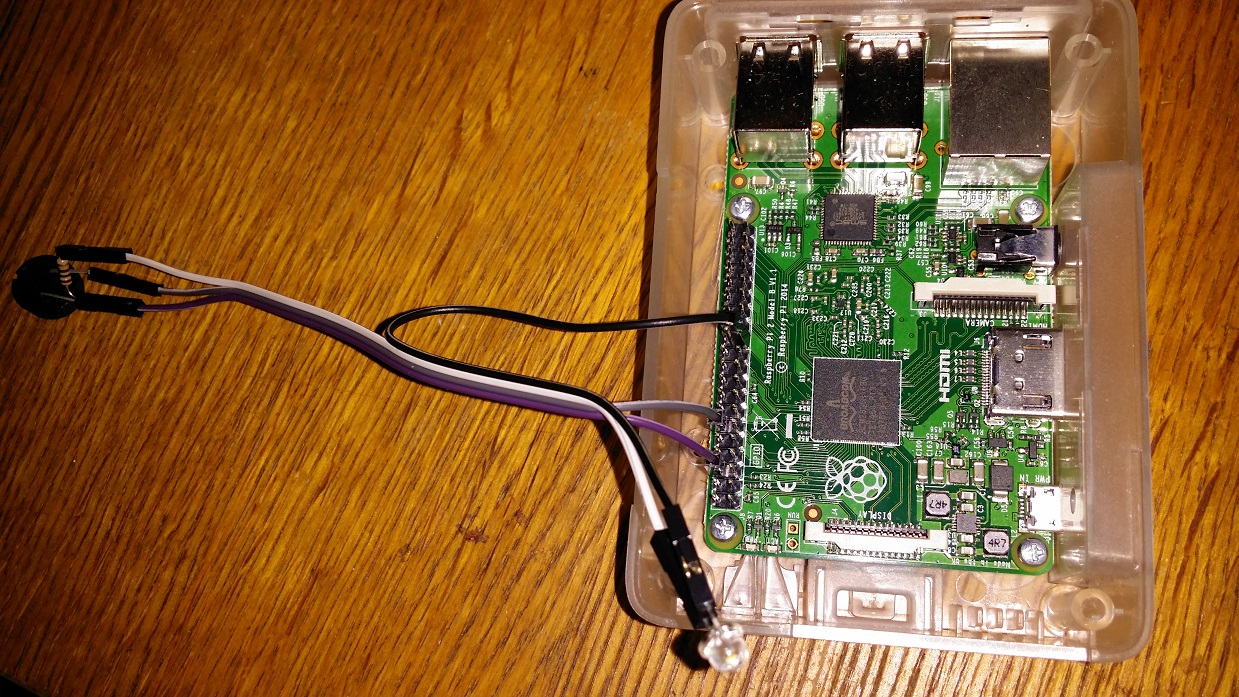
It's not that hard to build your own ROC. You need to get the following hardware. 1 Raspberry Pi-computer1 micro SD-card, at least 8 GB 1 housing for Raspberry Pi 1 USB powerbank 10 Ah or more 1 USB-cable from powerbank to Raspberry Optional hardware Connection 4g-modem (or something else) like Huawei E3372H-153Sound and light when ROC has connected to server and at first punch in every SI-unit 1 Buzzer1 Light emitting diod 1 Resistor 4 Cables to connect buzzer, diod and resistor with Raspberry Pi If you want to order a package with all hardware included there is one at m.nu. 4g-modem or other connection hardware you need to get separate though. If you are using a Raspberry Pi version 4 or higher, remember that you have to use version 7 of both ROC-image and web page. Version 7 works on all versions of Raspberry Pi. Buzzer and light emitting diod As an extra feature (part of m.nu package) you can add a buzzer and a light emitting diod. When the ROC knows that it has connected to the server and made a "Call home", the diod will light up for a minute and the buzzer will play a tune. When first punch is made in every SI-unit and it has been received by the web server, the ROC will play another tune and the diod will flash 4 times. If you have a clear housing for the Raspberry it will be easy to see the light emitting diod.
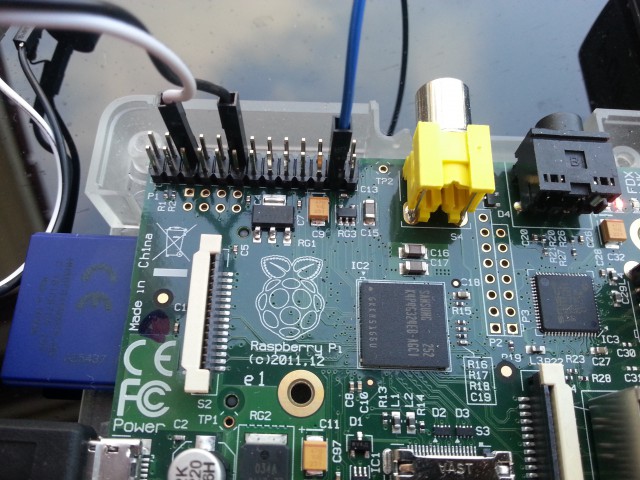
How do I connect the buzzer and the light emitting diod? Power is taken from a pin on the Raspberry (third pin from the left in the above row, se picture below). That cable is connected to one leg of the buzzer (doesn't matter which one) and the resistor (doesn't matter which leg). The other cable is connected to the other leg of the buzzer and the 6th pin from the left in above row on the Raspberryn. The other leg of the resistor is connected to the light emitting diods short leg. Connect a cable from light emitting diods long leg to Raspberrys 12th pin from the left in the below row.
 Detailed picture of Raspberry pin contact
If you only want the buzzer, remove the light emitting diod and the resistor. Then you should have cables in third and 6th pin from the left in the above row. If you only want the light emitting diod you remove the buzzer. It should leave you with cables third pin from left in above row and 12th pin from the left in below row.
If you only want to buy the extra components, here is a list. The buzzern is a Piezo Buzzer: |